ShopDreamUp AI ArtDreamUp
Deviation Actions


Description
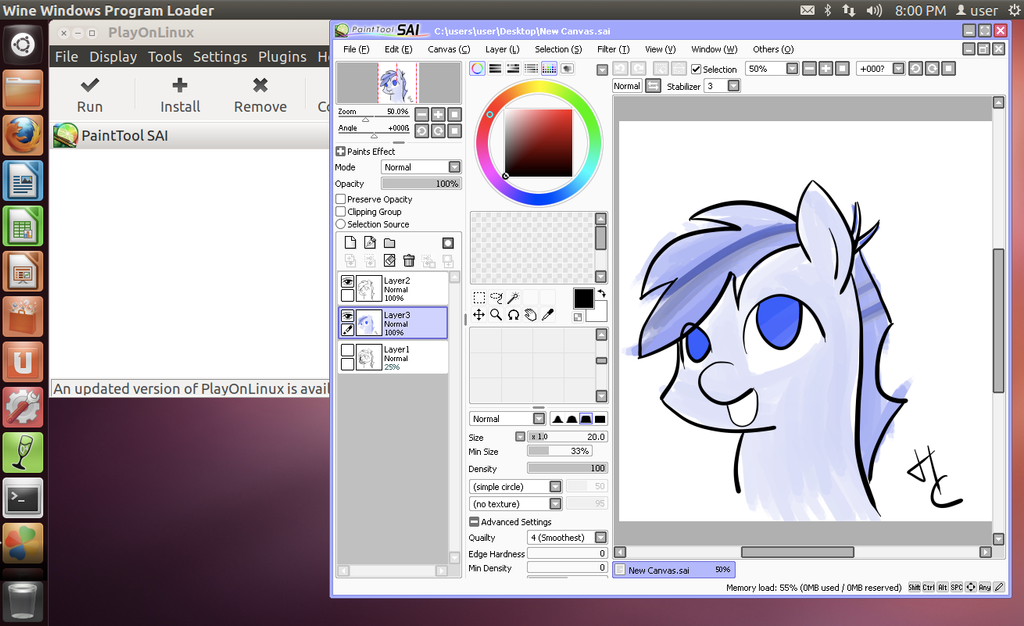
How To Install Paint Tool SAI on Linux and get pen pressure to work
**********[UPDATE 3/02/2014] **********
I'm really sorry that I haven't been responding to comments in the past 3 months. But I'm very happy to see that some people have stepped up to help others who are having problems with their setup - especially Superblobmonster, you're awesome. If you are having a problem, I won't be able to help in most cases since I've already put the entirety of my knowledge on this subject in this tutorial. I especially can't help if you're using a version of Linux or the Bamboo tablets that I don't have since I won't be able to reproduce the issue. But, if someone wants to donate space and host a completed VM (~20 GB) that has SAI and all these steps below setup, please send me a note. I think this would help a lot of people. I'll update this message if we set something up.
*************************** **********
I own a Macbook Pro but I found that Paint Tool SAI (PTS) was just the best tool for getting art done. The next best program was Fire Alpaca, but it had serious problems with crashing. I found that I could run PTS on my make using Wine or PlayOnMac, but when I did this, PTS would not use my drawing tablet's pen pressure. Thus rendering my Bamboo Capture tablet pretty much useless. Next I tried using my tablet in Windows 7 and Windows Server 2008 (which I used to use for work). It worked, but turning on either version of Windows would drain my mac's resources to the point of hair pulling uselessness. Hence, most of my artwork is still done on pen and paper.
Now comes the good part. The good folks who made PlayOnLinux have added a patch to their program* that allows pen pressure to work with PTS when running it in Linux. Now, I'm not a linux user, but the promise of running PST on an OS that wouldn't kill my system resources was too good to pass up. And boy I'm glad I tried it. After a day of scrounging around the internet and pulling information form various incomplete resources, I managed to get Paint Tool SAI running on Linux AND my Wacom Bamboo Capture's pen pressure works! Please note, that this is a rather recent development for PlayOnLinux. Last month (June, 15th 2013), they finally patched the program so that pen pressure would work with SAI (sadly, the patch did not work for PlayOnMac… I tried it).
So now, without further ado. Here are the steps that I took to get Pen Pressure working in PaintTool SAI running on Linux:
1) Install Ubuntu 12.04 with VMWare tools www.traffictool.net/vmware/ubu…
Other versions of linux may work, but I haven't tested any of them.
For this step, you must have VMWare Fusion my.vmware.com/web/vmware/info/… If you don't have it or can't afford it, then you may be able to find some other way to install Linux. I can't help you with that, but don't give up! There's lots of information out there so you may just find another way!
2) Next, download and install PlayOnLinux for the Precise version of Ubuntu. You can do this all from the terminal window in Ubuntu (can't find the terminal window? Click on "Dash Home" and type "terminal" in the search box). Open a terminal window and type the following commands :
wget -q "deb.playonlinux.com/public.gpg" -O- | sudo apt-key add -
sudo wget deb.playonlinux.com/playonlinu… -O /etc/apt/sources.list.d/playonlinux.list
sudo apt-get update
sudo apt-get install playonlinux
(NOTE: if you used the vmware image I linked to above, then your sudo password is "password". I strongly recommend you change that as soon as possible)
3) Install your drawing tablet's driver. I'm using a Wacom Bamboo Capture help.ubuntu.com/community/Waco…
4) Now we need to install the right version of Wine in to PlayOnLinux so that PaintTool SAI can use the pen's pressure sensitivity.
- Open PlayOnLinux.
- go to Tools-> Manage Wine Versions and install the version named "1.5.5-SAI". The list wasn't in order for me, so scroll through the whole thing until you find it.
5) Download the PaintTool SAI installer file form the official website: www.systemax.jp/en/sai/
- Just open the installer file and it should automatically open in PlayOnLinux.
- In the Installation For Paint Tool SAI window, change the Installation Folder to "C://Program Files/PaintToolSAI" then click Install.
- I named my virtual drive "SAI" and my program "Paint Tool SAI"
6) Now, you also need to download and unzip the cracked version of SAI: www.mediafire.com/?eryhqymywzn
You need this because there is a bug in PlayOnLinux that will not allow Paint Tool SAI to start if you only us the official install program. PTS thinks it needs Admin rights in order to check for previous versions of PTS. If the link is broken, just google search for Paint Tool SAI Free Full. (I do not advocate using unlicensed software. You should buy a license of PTS and support the fine people who made this awesome program. We are only using the cracked version here because I've not found any alternate method to instal PTS in PlayOnLinux and be able to use pen pressure. Maybe they will fix this bug someday).
7) Now that PTS is installed, we need to configure PlayOnLinux to use the right settings in order to use our pen's pressure.
- in PlayOnLinux, click Configure
- Then select the virtual drive named "SAI"
- under the General tab, change the Wine Version to 1.5.5-SAI
- now under the Miscellaneous tab, click on Open Virtual Drive's Directory. this will open a finder window (no idea if linux users have a different name for this).
- in the window, go to "drive_c" > Program Files > Paint Tool SAI
- Now you want to copy the contents of the cracked version of PTS over the contents of this folder. Make sure you overwrite the existing files.
- Next, open file misc.ini that is the root of the Paint Tool SAI folder and change TabletMouseSimulation = 0 to TabletMouseSimulation = 1 (if you fail to do this, the pen will twitch about the screen all on it's own)
- close the window now, you're done here.
8) In PlayOnLinux, select Paint Tool SAI then click Run. You're PTS should work. I'll edit this as required to make the instructions more clear.
[UPDATE!] 08/08/2013
One of the unfortunate problems with the setup above is that you cannot set your table's buttons using the Wacom Graphics Tablet window under System Settings in Ubuntu.
If you need to modify your tablet's setting, you will have to use the Terminal window, and a command called "xsetwacom". This is a pretty powerful little command, but I feel it's VERY poorly documented.
xsetwacom works, but any changes you make using it will be lost as soon as you unplug your tablet. Not very handy, huh? So, here is my work around solution. We're going to create a Shell Script that will setup the tablet for us. This way, we need only run the shell script after plugging in the tablet and it will do the rest.
First, lets setup the Shell Script. We'll use my tablets settings to begin with, then I'll talk about how you can modify it to suit your needs.
1) Open a terminal window and type:
2) Once inside the Editor, type i. This will allow you to insert / start typing your shell script.
3) Paste the code below into the script.
4) Exit the editor by typing an Esc then : (colon) then wq! and enter.
*This will write the changes to the file and bring you back to the terminal.
5) Make this Shell Script executable by typing:
Whenever you want to load these settings, open a Terminal window and type: ./LoadWacomSettings.sh
* your tablet must already be plugged in before you run the Shell Script.
Customizing your buttons
I have a Bamboo Capture, which has 4 buttons on the pad, and 2 on the stylus. Unfortunately, xsetwacom doesn't label the buttons in a way that appears to make sense. If you are not using a Bamboo Capture, you'll need to play with xsetwacom (or use Google) to find the IDs for each of your buttons. If you have the same tablet that I have, you're in luck! Here are the button IDs for the physical buttons starting from the top-left:
I recommend setting the buttons' actions using xsetwacom in a Terminal window in order to test your changes. This way, you'll see the errors and quickly be able to modify your commands.
To set the top button on the left side of my tablet to "Undo", I have to modify that button's action using a Terminal window and running the following command:
Let's break down that command into it's parts:
xsetwacom - we're calling on xsetwacom the execute the commands that follow
set - tell the command that we are setting an action. There is also a "get" command, but you don't need it here.
"Wacom Bamboo 16FG 4x5 Finger pad" - this is the name of our device. Specifically, it's the name of the tablet and it does not include the stylus of the touch pad. You can find out the name of all the Wacom devices by running the following command:
button 1 - this is the xsetwacom button ID that is listed above.
"key +ctrl z -ctrl" - this is the action we want the button to execute when pressed
NOTE: You need the keyword "key" at the beginning of your list of actions, otherwise you will get this error:
About the Action Commands:
There are 2 kinds of actions commands: mouse clicks and keyboard shortcuts
1) Mouse Clicks
There are just three values: 1 for left click, 2 for middle click, and 3 for right click. You may have noticed that I set the 2nd Stylus button to a right click in my script:
2) Keyboard Shortcuts
These commands make user of the + and -.
+ means "Press and hold this button"
- mean "release this button"
If you don't use either, it treats the command as if you pressed and immediately released the button. Please note that all commands mapped to a button are automatically released when you release the physical button you've mapped them to.
There are a lot of commands here, so begin by typing the following command in a Terminal window (it will list the modifiers that are available to you): xsetwacom --list modifiers
Here is the output of my modifiers (chances are good they are the same as yours):
Keep in mind that this list does not include regular keys such as "S" or "space", but you can use those keys as well.
In the shell script above, replace the commands that are inside the double quotes with your own set of keystrokes. For example: you might want your top button to be "Redo" instead of "Save". The shortcut for Redo is Control+y. So you'd set button 1 to "key +ctrl y".
Please note that not all keys work for commands. I tried using [ and ] but they didn't work (nor did they throw an error when I set them as my action). Paint Tool SAI uses these brackets to Increase and Decrease the pen size - a tool I find very handy. To get around this limitation, you'll need to setup the custom shortcuts in Paint Tool SAI to a command that xsetwacom will recognize. In this case, I set the Increase and Decrease the pen size command to Shift Pageup and Shift Pagedown.
I hope this wasn't too confusing and was actually helpful. I know it's a lot of information, but one you get everything setup, it's really easy to use your tablet with custom settings.
Side Note:
There was some rumbling the internet about some sort of config file you could setup under /etc/X11 so that your settings would auto-magically be set when you plugged in your drawing tablet, but I was never able to come close to getting that to work (if you know how to make this work, please feel free to comment below).
Good luck!
I own a Macbook Pro but I found that Paint Tool SAI (PTS) was just the best tool for getting art done. The next best program was Fire Alpaca, but it had serious problems with crashing. I found that I could run PTS on my make using Wine or PlayOnMac, but when I did this, PTS would not use my drawing tablet's pen pressure. Thus rendering my Bamboo Capture tablet pretty much useless. Next I tried using my tablet in Windows 7 and Windows Server 2008 (which I used to use for work). It worked, but turning on either version of Windows would drain my mac's resources to the point of hair pulling uselessness. Hence, most of my artwork is still done on pen and paper.
Now comes the good part. The good folks who made PlayOnLinux have added a patch to their program* that allows pen pressure to work with PTS when running it in Linux. Now, I'm not a linux user, but the promise of running PST on an OS that wouldn't kill my system resources was too good to pass up. And boy I'm glad I tried it. After a day of scrounging around the internet and pulling information form various incomplete resources, I managed to get Paint Tool SAI running on Linux AND my Wacom Bamboo Capture's pen pressure works! Please note, that this is a rather recent development for PlayOnLinux. Last month (June, 15th 2013), they finally patched the program so that pen pressure would work with SAI (sadly, the patch did not work for PlayOnMac… I tried it).
So now, without further ado. Here are the steps that I took to get Pen Pressure working in PaintTool SAI running on Linux:
1) Install Ubuntu 12.04 with VMWare tools www.traffictool.net/vmware/ubu…
Other versions of linux may work, but I haven't tested any of them.
For this step, you must have VMWare Fusion my.vmware.com/web/vmware/info/… If you don't have it or can't afford it, then you may be able to find some other way to install Linux. I can't help you with that, but don't give up! There's lots of information out there so you may just find another way!
2) Next, download and install PlayOnLinux for the Precise version of Ubuntu. You can do this all from the terminal window in Ubuntu (can't find the terminal window? Click on "Dash Home" and type "terminal" in the search box). Open a terminal window and type the following commands :
wget -q "deb.playonlinux.com/public.gpg" -O- | sudo apt-key add -
sudo wget deb.playonlinux.com/playonlinu… -O /etc/apt/sources.list.d/playonlinux.list
sudo apt-get update
sudo apt-get install playonlinux
(NOTE: if you used the vmware image I linked to above, then your sudo password is "password". I strongly recommend you change that as soon as possible)
3) Install your drawing tablet's driver. I'm using a Wacom Bamboo Capture help.ubuntu.com/community/Waco…
4) Now we need to install the right version of Wine in to PlayOnLinux so that PaintTool SAI can use the pen's pressure sensitivity.
- Open PlayOnLinux.
- go to Tools-> Manage Wine Versions and install the version named "1.5.5-SAI". The list wasn't in order for me, so scroll through the whole thing until you find it.
5) Download the PaintTool SAI installer file form the official website: www.systemax.jp/en/sai/
- Just open the installer file and it should automatically open in PlayOnLinux.
- In the Installation For Paint Tool SAI window, change the Installation Folder to "C://Program Files/PaintToolSAI" then click Install.
- I named my virtual drive "SAI" and my program "Paint Tool SAI"
6) Now, you also need to download and unzip the cracked version of SAI: www.mediafire.com/?eryhqymywzn
You need this because there is a bug in PlayOnLinux that will not allow Paint Tool SAI to start if you only us the official install program. PTS thinks it needs Admin rights in order to check for previous versions of PTS. If the link is broken, just google search for Paint Tool SAI Free Full. (I do not advocate using unlicensed software. You should buy a license of PTS and support the fine people who made this awesome program. We are only using the cracked version here because I've not found any alternate method to instal PTS in PlayOnLinux and be able to use pen pressure. Maybe they will fix this bug someday).
7) Now that PTS is installed, we need to configure PlayOnLinux to use the right settings in order to use our pen's pressure.
- in PlayOnLinux, click Configure
- Then select the virtual drive named "SAI"
- under the General tab, change the Wine Version to 1.5.5-SAI
- now under the Miscellaneous tab, click on Open Virtual Drive's Directory. this will open a finder window (no idea if linux users have a different name for this).
- in the window, go to "drive_c" > Program Files > Paint Tool SAI
- Now you want to copy the contents of the cracked version of PTS over the contents of this folder. Make sure you overwrite the existing files.
- Next, open file misc.ini that is the root of the Paint Tool SAI folder and change TabletMouseSimulation = 0 to TabletMouseSimulation = 1 (if you fail to do this, the pen will twitch about the screen all on it's own)
- close the window now, you're done here.
8) In PlayOnLinux, select Paint Tool SAI then click Run. You're PTS should work. I'll edit this as required to make the instructions more clear.
[UPDATE!] 08/08/2013
One of the unfortunate problems with the setup above is that you cannot set your table's buttons using the Wacom Graphics Tablet window under System Settings in Ubuntu.
If you need to modify your tablet's setting, you will have to use the Terminal window, and a command called "xsetwacom". This is a pretty powerful little command, but I feel it's VERY poorly documented.
xsetwacom works, but any changes you make using it will be lost as soon as you unplug your tablet. Not very handy, huh? So, here is my work around solution. We're going to create a Shell Script that will setup the tablet for us. This way, we need only run the shell script after plugging in the tablet and it will do the rest.
First, lets setup the Shell Script. We'll use my tablets settings to begin with, then I'll talk about how you can modify it to suit your needs.
1) Open a terminal window and type:
vi LoadWacomSettings.sh2) Once inside the Editor, type i. This will allow you to insert / start typing your shell script.
3) Paste the code below into the script.
#!/bin/bash

DEVICE="Wacom Bamboo 16FG 4x5 Finger touch" ;
echo "Turning OFF Touch.";
xsetwacom set "$DEVICE" touch off;
DEVICE="Wacom Bamboo 16FG 4x5 Finger pad" ;
echo "Setting Pad's Physical Button 1 to CTRL+S.";
xsetwacom set "$DEVICE" button 1 "key +ctrl s -ctrl";
echo "Setting Pad's Physical Button 2 to CTRL+Z.";
xsetwacom set "$DEVICE" button 9 "key +ctrl z -ctrl";
echo "Setting Pad's Physical Button 3 to Shift+PgUp.";
xsetwacom set "$DEVICE" button 8 "key +shift Pgup";
echo "Setting Pad's Physical Button 4 to Shift+PgDn";
xsetwacom set "$DEVICE" button 3 "key +shift Pgdn";
DEVICE="Wacom Bamboo 16FG 4x5 Pen stylus" ;
echo "Setting Pen's Lower Button to Pan";
xsetwacom set "$DEVICE" button 2 "key +space";
echo "Setting Pen's Upper Button to Right Click";
xsetwacom set "$DEVICE" button 3 3;
4) Exit the editor by typing an Esc then : (colon) then wq! and enter.
*This will write the changes to the file and bring you back to the terminal.
5) Make this Shell Script executable by typing:
chmod +x LoadWacomSettings.shWhenever you want to load these settings, open a Terminal window and type: ./LoadWacomSettings.sh
* your tablet must already be plugged in before you run the Shell Script.
Customizing your buttons
I have a Bamboo Capture, which has 4 buttons on the pad, and 2 on the stylus. Unfortunately, xsetwacom doesn't label the buttons in a way that appears to make sense. If you are not using a Bamboo Capture, you'll need to play with xsetwacom (or use Google) to find the IDs for each of your buttons. If you have the same tablet that I have, you're in luck! Here are the button IDs for the physical buttons starting from the top-left:
Physical Button | Button ID in xsetwacom
pad Button 1 | button 1
pad Button 2 | button 9
pad Button 3 | button 8
pad Button 4 | button 3

pen button 1 | button 2
pan button 2 | button 3
I recommend setting the buttons' actions using xsetwacom in a Terminal window in order to test your changes. This way, you'll see the errors and quickly be able to modify your commands.
To set the top button on the left side of my tablet to "Undo", I have to modify that button's action using a Terminal window and running the following command:
xsetwacom set "Wacom Bamboo 16FG 4x5 Finger pad" button 1 "key +ctrl z -ctrl"Let's break down that command into it's parts:
xsetwacom - we're calling on xsetwacom the execute the commands that follow
set - tell the command that we are setting an action. There is also a "get" command, but you don't need it here.
"Wacom Bamboo 16FG 4x5 Finger pad" - this is the name of our device. Specifically, it's the name of the tablet and it does not include the stylus of the touch pad. You can find out the name of all the Wacom devices by running the following command:
xsetwacom --list devicesbutton 1 - this is the xsetwacom button ID that is listed above.
"key +ctrl z -ctrl" - this is the action we want the button to execute when pressed
NOTE: You need the keyword "key" at the beginning of your list of actions, otherwise you will get this error:
Cannot parse keyword '+ctrl' at position 1About the Action Commands:
There are 2 kinds of actions commands: mouse clicks and keyboard shortcuts
1) Mouse Clicks
There are just three values: 1 for left click, 2 for middle click, and 3 for right click. You may have noticed that I set the 2nd Stylus button to a right click in my script:
xsetwacom set "$DEVICE" button 3 32) Keyboard Shortcuts
These commands make user of the + and -.
+ means "Press and hold this button"
- mean "release this button"
If you don't use either, it treats the command as if you pressed and immediately released the button. Please note that all commands mapped to a button are automatically released when you release the physical button you've mapped them to.
There are a lot of commands here, so begin by typing the following command in a Terminal window (it will list the modifiers that are available to you): xsetwacom --list modifiers
Here is the output of my modifiers (chances are good they are the same as yours):
userubuntu:~$ xsetwacom --list modifiers
20 modifiers are supported:
 ctrl
 ctl
 control
 lctrl
 rctrl
 meta
 lmeta
 rmeta
 alt
 lalt
 ralt
 shift
 lshift
 rshift
 super
 lsuper
 rsuper
 hyper
 lhyper
 rhyper

46 specialkeys are supported:
 f1
 f2
 f3
 f4
 f5
 f6
 f7
 f8
 f9
 f10
 f11
 f12
 f13
 f14
 f15
 f16
 f17
 f18
 f19
 f20
 f21
 f22
 f23
 f24
 f25
 f26
 f27
 f28
 f29
 f30
 f31
 f32
 f33
 f34
 f35
 esc
 Esc
 up
 down
 left
 right
 backspace
 Backspace
 tab
 PgUp
 PgDn
Keep in mind that this list does not include regular keys such as "S" or "space", but you can use those keys as well.
In the shell script above, replace the commands that are inside the double quotes with your own set of keystrokes. For example: you might want your top button to be "Redo" instead of "Save". The shortcut for Redo is Control+y. So you'd set button 1 to "key +ctrl y".
xsetwacom set "$DEVICE" button 1 "key +ctrl y";Please note that not all keys work for commands. I tried using [ and ] but they didn't work (nor did they throw an error when I set them as my action). Paint Tool SAI uses these brackets to Increase and Decrease the pen size - a tool I find very handy. To get around this limitation, you'll need to setup the custom shortcuts in Paint Tool SAI to a command that xsetwacom will recognize. In this case, I set the Increase and Decrease the pen size command to Shift Pageup and Shift Pagedown.
I hope this wasn't too confusing and was actually helpful. I know it's a lot of information, but one you get everything setup, it's really easy to use your tablet with custom settings.
Side Note:
There was some rumbling the internet about some sort of config file you could setup under /etc/X11 so that your settings would auto-magically be set when you plugged in your drawing tablet, but I was never able to come close to getting that to work (if you know how to make this work, please feel free to comment below).
Good luck!
Image size
1311x801px 417.69 KB
© 2013 - 2024 HardCyder
Comments201
Join the community to add your comment. Already a deviant? Log In
Anyone encounter the error where it cannot find Free Type? This only happens if I use the sai version of wine. if so how did you fix it?